I did not want this lab to become another copy-and-paste command session. I wanted to understand what each tool was doing, why the output mattered, and how I could reason through the workflow without guessing.
That shift in mindset changed the lab completely. It stopped
being about memorizing mvn package and started
becoming about reading a project, confirming prerequisites,
building cleanly, producing an artifact, and deploying that
artifact in a repeatable environment.
Why This Lab Matters Beyond Maven
In a real team, nobody wants a build engineer who only knows the happy-path command. Teams need someone who can identify the build tool, read the project structure, verify versions, find the output, and explain why deployment succeeds or fails.
Project recognition
Seeing pom.xml immediately tells me Maven is the
build system and the packaging rules live there.
Artifact awareness
A build is not finished just because logs say success. I need to know exactly what artifact was produced and where it lives.
Deployment thinking
A server or container can be healthy while the application is still missing, broken, or deployed under a different path.
Reading the Project First
The clearest signal that this was a Maven project was the
presence of pom.xml. That file defines the project
metadata, dependencies, plugins, and packaging type. Once I saw
that file, the next questions became obvious:
- Which Java version does this project expect?
- Which Maven version is installed locally?
- What kind of deployable output will Maven produce?
- Where will that output go after packaging?
Confirm the Java Runtime
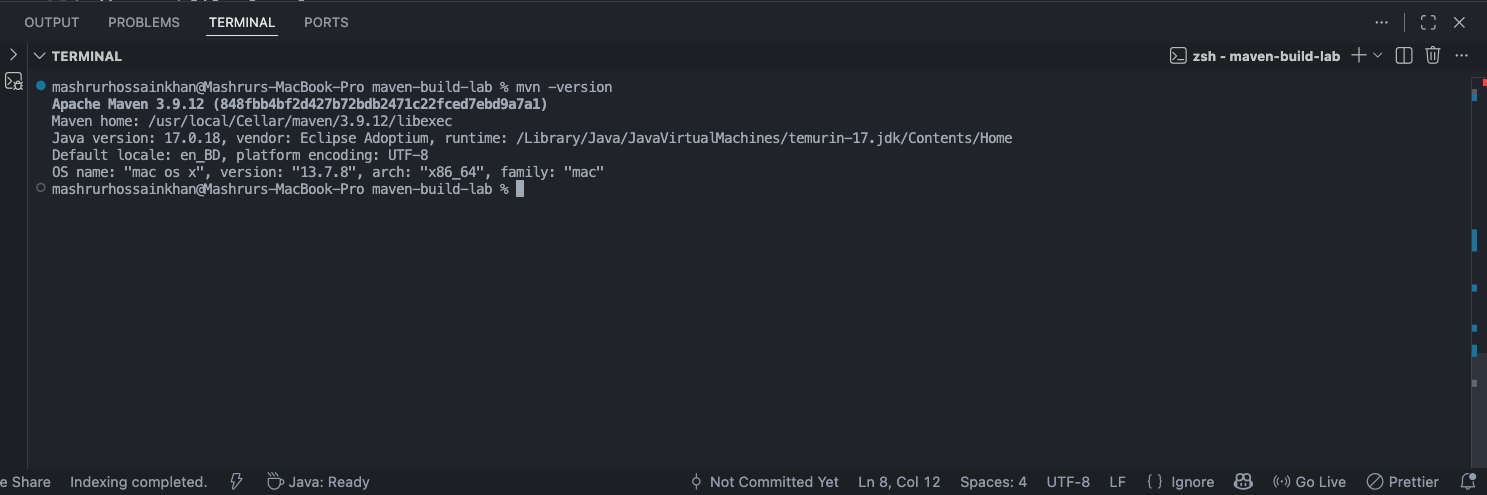
The first practical check was the Java version. That sounds basic, but version mismatches are one of the most common causes of build failures. The screenshot shows Java 17.0.18 installed locally, which aligned with the environment I was using for the lab.

Check the Maven Toolchain
After Java, I checked Maven itself. The environment shows Apache Maven 3.9.12, along with the Java runtime Maven is using under the hood. This matters because build behavior can change depending on both the Maven version and the Java version Maven is attached to.
Start Small with the Maven Lifecycle
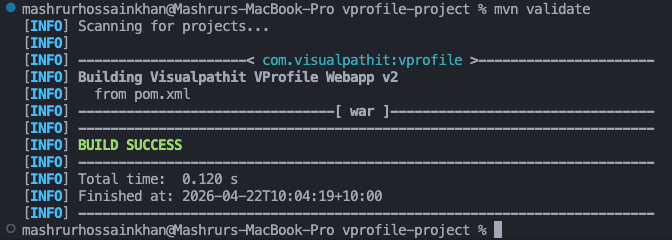
Instead of jumping straight to a full build, I walked through
the lifecycle in smaller steps. Running
mvn validate first gave me a clean check that the
project structure and configuration could be read correctly.
Run the Test Phase and Observe the Pipeline
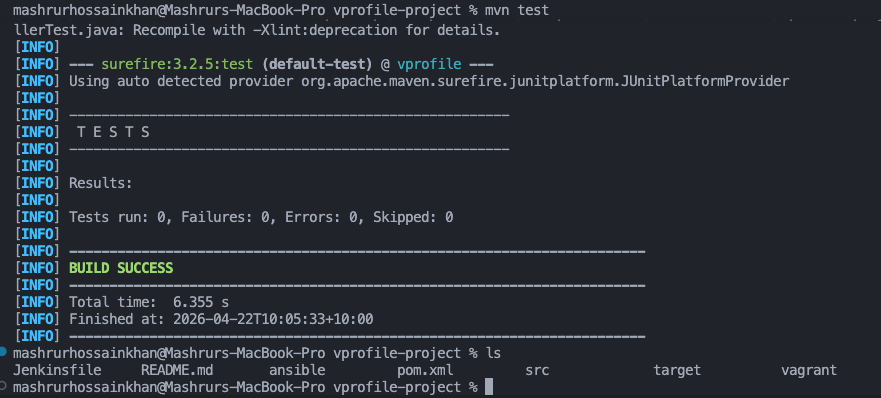
Next came mvn test. In this lab, the test phase
completed successfully and reported zero executed tests, but the
important point was still clear: Maven has a defined lifecycle,
and the test stage is part of that pipeline whether the project
has many tests or very few.
Package the Application into a WAR Artifact
Packaging was the step that made the lab feel real. Maven
assembled the web application, created the
target directory contents, and produced the final
artifact: target/vprofile-v2.war.
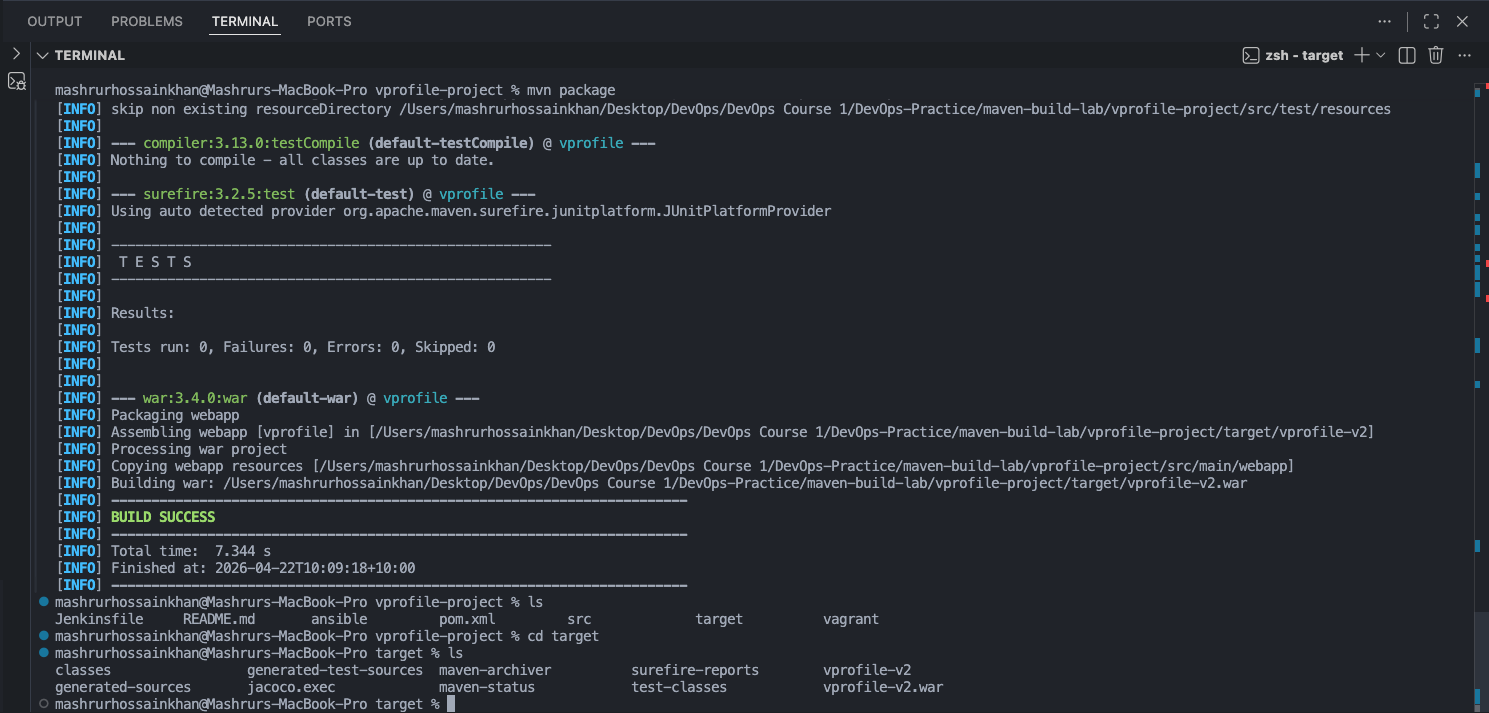
target/
contains the output of this project build, while
~/.m2/repository is Maven's local dependency cache.
They are related to the build, but they serve different roles.
This was also the point where mvn clean package
made more sense to me. A clean build removes old output first,
which reduces the risk of stale compiled files affecting the
current result.
Prepare the Deployment Environment with Docker
Rather than installing Tomcat directly on my machine, I used Docker to keep the runtime isolated and reproducible. Before doing that, I checked the Docker version so I knew the container runtime was ready.

Launch a Tomcat Container
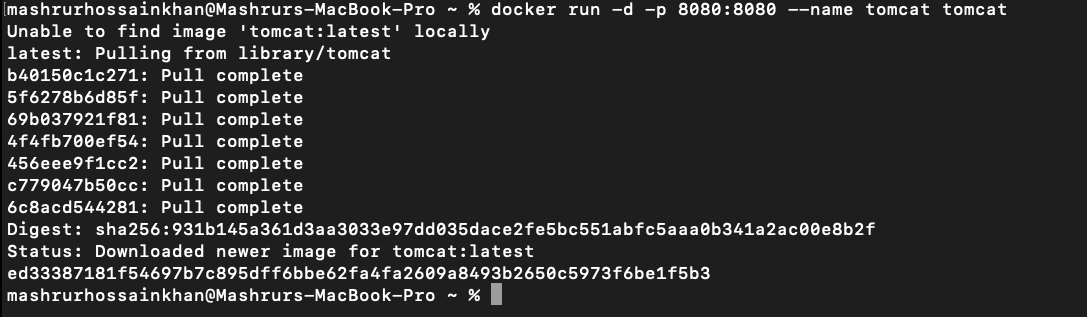
With Docker available, I started a Tomcat container on port 8080. The first run pulled the image from Docker Hub and then created the container locally. That is a useful reminder that the first execution often includes environment setup work beyond just starting a process.
Verify the Container Is Actually Running
A deployment flow should never rely on assumption. I checked the running containers to confirm Tomcat was up, mapped to port 8080, and ready for the next step.

Copy the WAR into Tomcat
Once the container was ready, I copied the built WAR file into
Tomcat's webapps directory. This is the handoff
moment where the build artifact leaves the build workspace and
enters the application server.

Restart Tomcat to Load the Application
After copying the artifact, I restarted the container so Tomcat could detect the WAR cleanly and expand it. This made the deployment state explicit instead of hoping the application would appear automatically.

Confirm the Application Path and See the Result
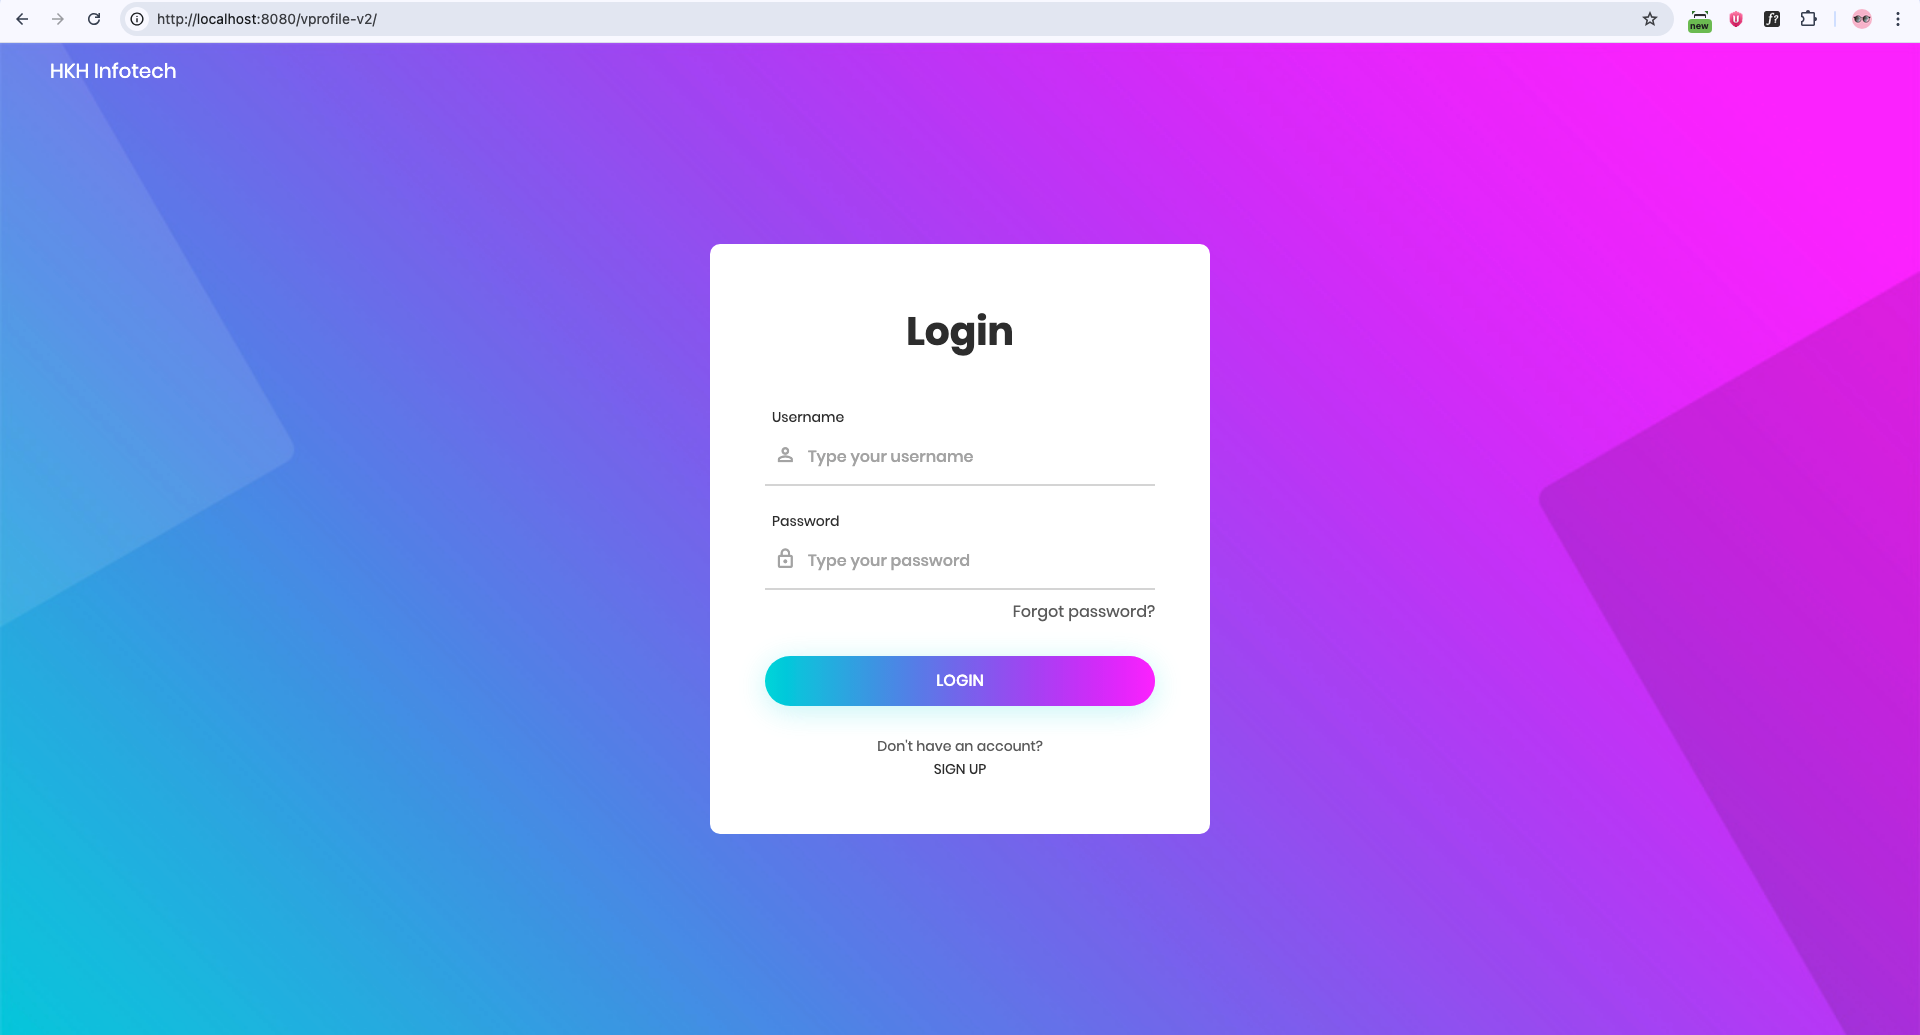
The final screenshot shows the application running at
http://localhost:8080/vprofile-v2/. That path is
important. The app was not deployed at the root URL; it was
deployed under the WAR context path. That is a small detail, but
it explains a lot of beginner confusion when a container is up
and the browser still returns the wrong page or a 404 at
/.
What the Lab Actually Taught Me
How code becomes runnable
Source code is only the beginning. It has to be validated, tested, packaged, and deployed before users can interact with it.
What a build tool really does
Maven is not just a command launcher. It is a structured workflow for turning project configuration and source code into a predictable output.
Why artifacts matter
The WAR file is the contract between build and deployment. If I understand the artifact, I understand what must be shipped.
Why isolation helps
Using Docker for Tomcat made the server environment easier to reproduce and kept the deployment story cleaner on my local machine.
Why debugging matters
Every stage can fail for a different reason: wrong versions, dependency problems, missing runtime tools, incorrect paths, or deployment assumptions.
Why this is DevOps foundation
This manual flow is the same logic CI/CD pipelines automate. The pipeline only makes sense if the underlying steps make sense first.
My Biggest Takeaway
The most valuable lesson was not to memorize isolated commands. It was to understand the pattern behind them.
In Java projects, that pattern might be
pom.xml, Maven, a WAR or JAR artifact, and an
application server. In Node.js, it might be
package.json, npm, a build directory, and a runtime
service. The tools change, but the thinking stays similar:
identify the prerequisites, build the code, produce the output,
and deploy it in the right environment.
What I Want to Explore Next
- Run the full application with all required backend services
- Automate the build and deployment with Jenkins or GitHub Actions
- Containerize more of the stack, not just Tomcat
- Deploy the application as an end-to-end project on AWS
This lab gave me the missing bridge between source code and real deployment. That bridge is exactly where DevOps becomes practical.